| ||
|
Third Gen.Org My family homepage Engine video Porsche Page |
last updated August, 2025I've set up this website to document my Trans Am project. I have a 1990 Pontiac Trans Am GTA. I want to build a more powerful engine and put it into the car. I also want to restore the interior and exterior to like-new condition.
Getting a Trans AmI used to drive a Honda Accord sedan. It was a good, dependable, boring car. Then one day I couldn't stop in time and skidded into the back of an old pickup truck. The truck didn't get a scratch, but the Honda was totaled. I looked around trying to find something comparable that I could afford with the insurance money, but every boring, dependable sedan was a few thousand dollars more. As kind of a joke, in my frustration I typed "Trans Am" into the Craigslist search box. What I found was a half dozen cool cars at half the price of a sedan.I picked out the best example and made an offer, and then I was the owner of Trans Am. The car was 20 years old, and had lots of little things wrong with it. I found myself spending a lot of time in the garage, replacing a pop-up headlight motor or greasing the locking mechanism so that the power locks would work. I found I really enjoyed working on the car. My grandfather and my father were both mechanics, and they taught me a lot. When I was younger, I didn't have much money so I drove crappy cars that I had to work on myself to keep them running. I was glad when I got a good enough job I didn't need to do that anymore. Having the Trans Am reminded me of how rewarding that was, and I realized I missed it. Plus it was really cool. The PlanMy Trans Am originally came with a 305cu (5.0 liter) engine with Tuned Port fuel injection. It produced 220 horsepower, which wasn't bad in 1990. But it would not be hard to do much, much better.The 350cu (5.7 liter) engine was another option for the 1990 TA, the classic Gen I engine that Chevrolet produced from 1955 to 2002. It was incrementally improved over the decades, and it makes a great foundation that is easy to improve from the stock configuration. There is a massive aftermarket system for increasing the power output of the 350, and a wealth of information on how to do it. I've done a lot of research to come up with a plan for my build. The plan is to find a used 350 engine, then bore and stroke it to a larger displacement of 383cu (6.2 liters). Then add Vortec cylinder heads and a performance cam shaft. Then improve the exhaust system with some new headers and muffler system. And finally, add an aftermarket ECU (Engine Control Unit - basically the car's computer). All this should get me somwhere in the range of 350 horsepower. After listening to me talk for a long time about my build plan, a friend asked me, "well, why do you want all that horse power? What will you do with it?" I thought about it for a minute. I didn't really have a great answer, but I finally came up with this reply: "'cause then I can do some tire-smoking burnouts!"
Latest News
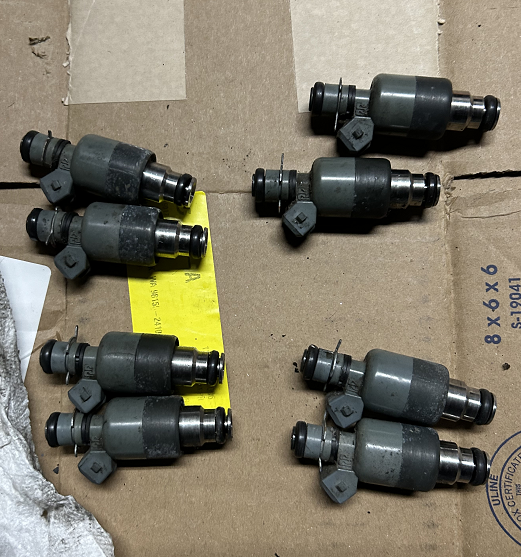
September 2025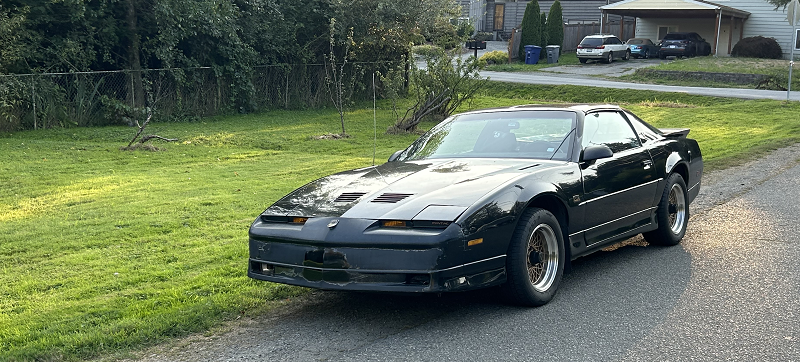 The car sat for two days down the street from my house. Finally, I got my neighbor to help with his truck and a tow strap, and we got it back to my driveway. It sat for a while, but I came up with a new idea, based on how my motorcycle broke down earlier this summer. I said in an earlier post that when you get down to basics, the problem is either fuel, air, or spark, or compression. I did a compression test. I refurbished the fuel injectors (which were the most likely fuel system problem). Air is really simple, so not a likely suspect. That leaves spark. The Trans Am's electrical system could fail in a number of ways, but having an intermittent electrical problem that happens as the car warms up strongly suggests an issue with the coil. So I started there and orded a new coil.
Now I had to determine if the problem was really solved. I drove around the block for about 15 minutes, and it didn't die. I parked it for 15 minutes, then drove another 15 minutes with no issues. Then I started driving around my neighborhood, gradually going further and further as my confidence increased. Finally I drove it for a half hour out and then a half hour home, and it ran fine. The problem was solved! After 8 years of sitting in my driveway, the Trans Am is back on the road. It's running fine, no trouble with the radiator or the ignition. I started in the spring trying to get it running again, and it took until the end of summer, but it works. I'm very happy, and inspired to get working on the new engine. Hopefully next summer I'll be putting that engine into the car. I've got a few things I can work on over the winter to get ready for that project, and I'm eager to get started now. The Trans Am is back!
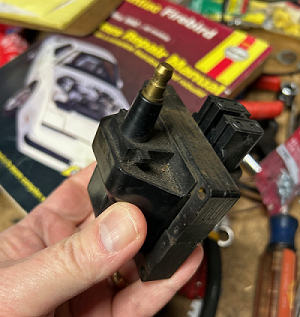
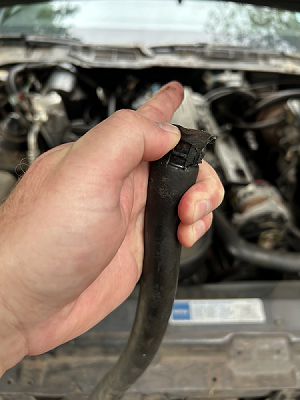
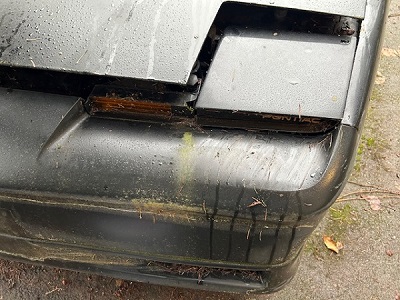
August 2025Well, good news and bad news and more bad news. Good news: I got the bypass valve and installed it. Here's the old one with the broken prong next to the new one already installed.
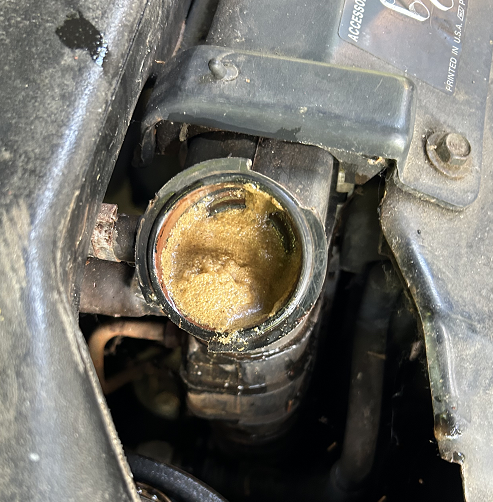
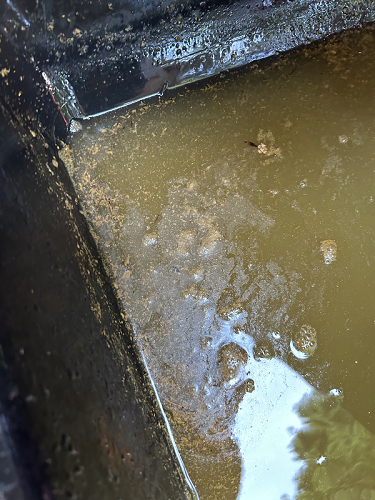
Bad news: I had to refill the cooling system, now that I had all the hoses connected back up. And back in time to when my car was new, GM was making the switch from green antifreeze to orange. The orange, sometimes marketed as Dex-Cool, has different chemical additives that are supposed to protect the aluminum and nylon that were relied on more and more in radiator technology. So my car has been using the orange for as long as I've owned it. I went and bought some "Universal Coolant" at the auto parts store. It didn't specifically say Dex-Cool, but it had an orange background on the label. I added it to my radiator and instantly realized this was green stuff. My radiator can use green stuff and it probably wouldn't hurt anything, but one thing you have to be careful about is mixing green and orange. If you mix them, there can be a chemical reaction that will create this icky sludge that can clog up your radiator and your car's cooling system. So I was concerned. My cooling system had been completely drained for the heater core work, and I was hopeful that it would be okay. But there was enough of the orange dried on the interior surfaces to cause the chemical reaction. When the fluid got to the top of the radiator, I could see all this goop floating on top of the coolant.
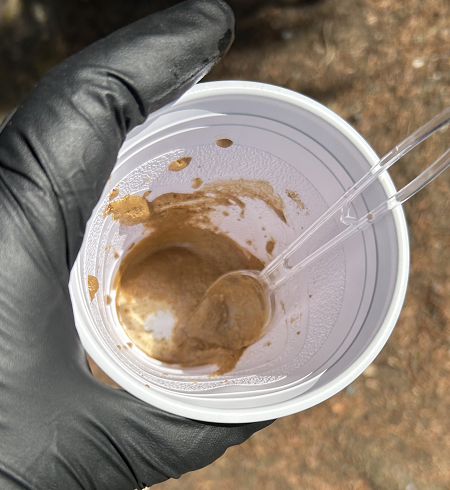
I immediately drained the radiator and then added distilled water to flush out the goop. But there was still a lot of goop floating in the clean water. I figured that the coolant hadn't circulated through the engine block. Because I hadn't turned the engine on, the water pump hadn't been working and the thermostat hadn't opened up. So at this point, the damage was confined to the radiator itself. This was not a great situation to be in. The best course of action would be to take the car to a mechanic or to Jiffy Lube and have them flush and fill the radiator. They have the special tools and the disposal system in place for the chemicals that I don't otherwise have access to. I thought about towing the car to Jiffy Lube, but I wasn't sure if they had a policy against working on cars that don't run. I'd have to push the car into the bay! I decided I would drive to Jiffy Lube. It's only about a half mile away from my driveway. I only had a little coolant in the system, so I was concerned about overheating, but such a short drive would probably be okay. And this would be a great way to test the new injectors and confirm they fixed the problem. If it was fixed, I would be able to get to Jiffy Lube. If it was not fixed, the car might die on the road on the way there. And that brings me to the more bad news. I made it about halfway to Jiffy Lube, and the car died. A couple months ago, I had been really down on this project, and I had even thought about selling the Trans Am. But I was so excited about it running again with the new injectors, that even the coolant fiasco hadn't dimmed my enthusiasm. But here we are, in a worse situation than before I started working on the car. Not only will it not run, but now the cooling system is full of sludge! As the car youtubers at Donut Media often say, cars are pain.
August 2025Well, it took a long time. Weekends came and went without me getting to the Trans Am. I went on two vacations, work got busy, etc., etc. But on my birthday weekend, I spent 5 hours working on the Trans Am. I got almost everything back together. Only one problem, when I was reattaching the heater core hoses, I broke the plastic heater bypass valve. It has 3 hoses that attach to it, and one of the prongs broke off as I was trying to position the hoses to reconnect them. I have to order another one, but it should take 5 minutes to install once it gets here. I'm so close to getting the car running again. I can't wait to take her for a ride.
June 2025Well, I've cheered up some. I went to a Cars and Coffee and saw everyone showing off their cars, and that gave me some inspiration. I also watch a lot of car Youtubers, and watching a couple of them face challenges that almost derail their projects, and then watching them come back from that to solve their issues, really helped me get my head in a better place.I ordered another heater core, and this one fit! I got it in place but not quite buttoned up. The dash is still apart. I need to get everything back together and go out on a test drive. I'm excited to find out if the refurbished injectors did the trick!
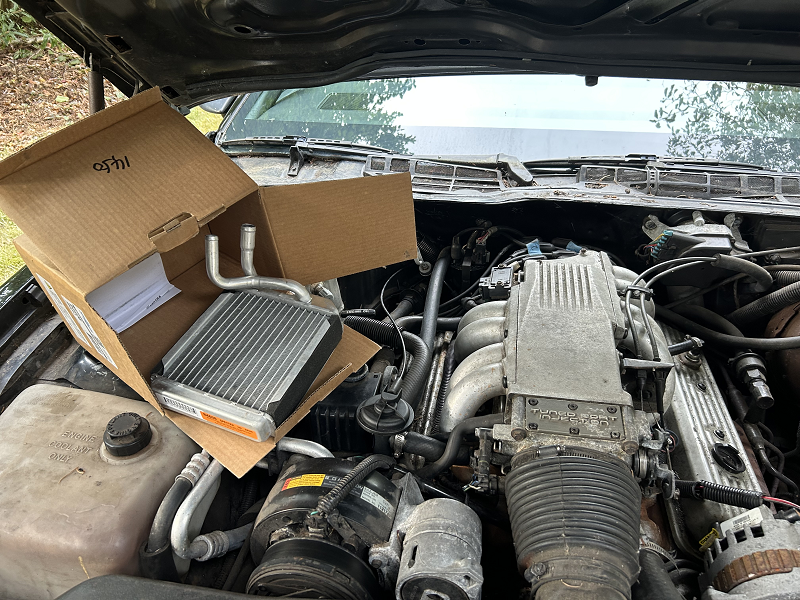
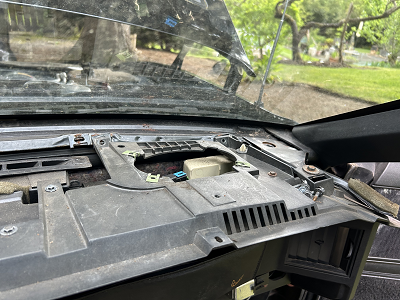
April 2025I got the refurbished injectors in and the car started right up. I let it idle for about 20 minutes, as it hadn't been run in a long time. Once it got warmed up, and before I could take it for a drive, I noticed a lot of steam coming out from under the hood, and a leak in the passenger side footwell coming from under the dash. There is some kind of leak in my heater core. Very frustrating. I didn't even get to take it for a drive with the refurbished injectors.The heater core is a real pain to replace. You have to remove a lot of the dash, and you have to lay across the door sill with your head in the footwell. I'm old, and my body is not as strong and flexible as it used to be. This is not the kind of work I enjoy.
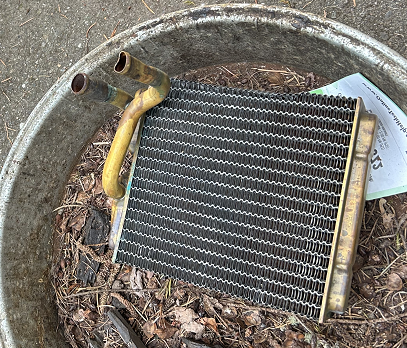
I got the dash apart and I got the new heater core into place in the vent system. The output pipe was dented, and the hose had a small hole in it where the clamp was tightened on it. This is definetely the problem.
I got the new heater core up under the dash, but I couldn't the intake out outflow pipes to line up with the holes in the firewall. It was super frustrating. After tyring for maybe an hour, I searched the internet for suggestions on how to get it to fit. I found lots of stories of people who had the same problem. It appears there is a lack of quality control in the aftermarket part industry, with regards to heater cores. One person posted how he ended up ordering 5 different heater cores. He just started trying to install them, one after the other, and the third one was the first that fit. He sent the others back for a refund. I talked to my neighbor, wo builds race cars. He has special machines for bending pipes that he uses to build roll cages. I asked him if it would be possible to bend the pipe on my new heater core so it would fit. He said trying to bend the pipe would break the heater core, and if it didn't crack outright, it would start leaking soon after I started using it. He recommended cutting the hole in the firewall that the pipe goes through. The pipe is only about a half an inch off, and he suggested I could use a angle grinder or sawzall to make the existing hole just a little bit bigger. A third option would be to bypass the heater core. They make delete kits for this, when people turn old firebirds and camaros into race cars. It's just a new set of heater hoses that skip going to the heater core. That option would mean that I would have no heat in the car in winter, and no defrost. That last bit would be super impractical for our northwest weather. I don't know what to do. These are my options: 1. buy a bunch of heater cores and hope one fits 2. cut up my firewall to make the holes bigger 3. bypass the heater core completely. None of these are good choices and I'm very frustrated. This is a real low point for me with this project. I wonder if it's even worth it to keep trying, or if I should put the car up for sale. Seriously, that's how bad I'm feeling about it right now. It's been sitting for so long and year after year, I haven't been able to carve out time to work on it. And when I finally do, I run into problems that I just can't overcome. Maybe I'll feel better after I've had some time to think on it.
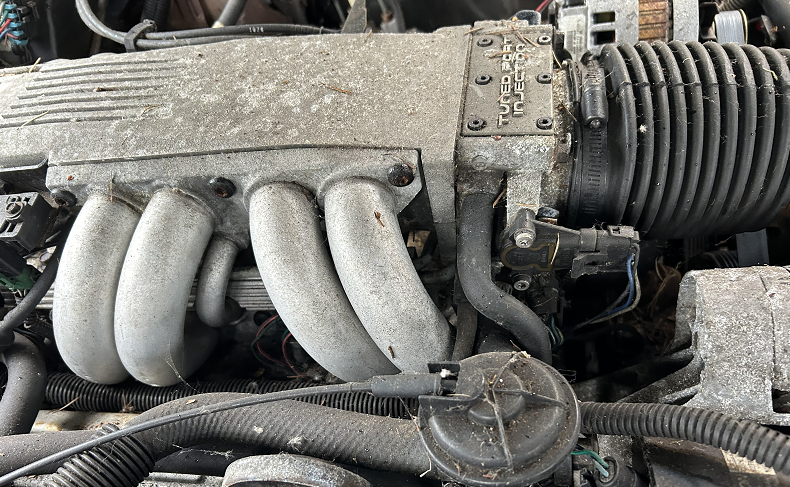
March 2025The car has been sitting for a looong time. 8 years. It's been sitting for twice as long as it was my daily driver. I try to fire it up every couple months and let it idle for a while, to keep everything working. It "ran when parked", but it's been having a strange issue where it will die after driving a little bit. After sitting for a day, it will restart and idle fine again.I figure if I can fix this problem, if I can get the car running properly, and drive it around a little, it will motivate me to work on the new engine and get the project moving forward. The first step is to figure out what the hell is wrong with the car. It's such a strange problem, because the car will idle in the driveway for an hour without problems, but if you drive it half a mile, the engine will die while you are cruising down the road. So, when your engine won't run, it's always one of three things - fuel, air, and spark. All of these are working at some level, or it wouldn't start and idle in the driveway. Now, the car has sat a lot over the last 8 years, and gas can go bad. Gas starts to lose it's effectiveness after about 3 months of sitting. After that, your engine will run a little rougher and have less power. But if gas sits for more than a year, it starts to break down and gums and varnish separate out of it. Those things can clog up your fuel system. I've tried to keep the gas tank mostly empty and only add non-ethanol gas when needed, but I know I got lazy at times, and I did move away for a year and left the car sitting. So it seemed plausible that the gas had gone bad at some point and clogged up the fuel injectors. It could clog other things, like the fuel pump or fuel filters, but the injectors are probably the part of the fuel system that would be most sensitive to clogging. So, now I have a plan. Remove the fuel injectors and take them to a shop that can clean them. The injectors are under the intake plenum. One of the things I love about the Trans Am is the way the plenum looks. It uses something called Tuned Port Injection, or TPI. The intake manifold has 8 tubes going from the plenum to the cylinders. GM used this technology from 1985 to 1992, in Corvettes, Camaros and Firebirds. It is such a distinctive look and it's instantly recognizable. No other engines have anything similar. I really want to keep the TPI setup for the hot engine I'm building, even though it will limit the performance I will get out of it.
So I removed the plenum to get to the injectors and got them out. I took them to Kirkland Transmission. They specialize in injector cleaning and refurbishing.
They gave me a fancy report showing what percentage of degradation has occurred in each injector. Each one was somewhere between 85% and 50%, with one injector being totally broken and unfixable. After the refurbishement, the working injectors are at 95% or above. Hopefully, this will resolve my issue!
January, 2025
Wow, it's been a long time since I touched the Trans Am. Life really got in the way. The Porsche, which was supposed to be something to drive while I worked on the Trans Am, became a project of it's own. My personal life also got very crazy, with a lot of family issues that took up most of my focus. And I even moved to Alaska for a year and grew an epic beard. I didn't do anything on the Trans Am during that whole time.
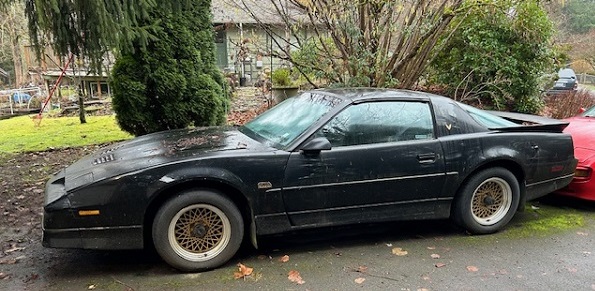
But this weekend, I went out and took a look. The Trans Am is in sad shape. There was mold on the upholstry, leaves and pine needles all over the car, moss and alge growing in various places, one of the tires was flat, and the battery was dead. The paint has been worn down in spots, with the clear coat gone in spots and a couple places primer is exposed. It broke my heart. I cleaned it up a little, cleaned away the interior mold, cleared away a lot of the leaves and pine needles, put air in the tires and removed the battery and put it on the charger.
It will be a coupe weeks before I can get back to it again, but it felt great to touch the car again. I have some plans on my next steps. It's hard sometimes to do wrenching in the Seattle winter. It's dark and rainy most of the time, and I have to work in my uncovered driveway. But now that my life has calmed down somewhat, I'm determined to get back to making my TA much more awesome.
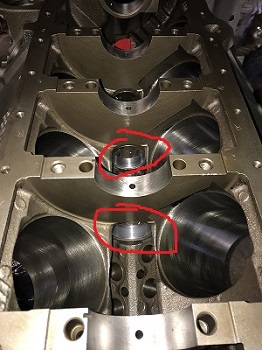
February, 2020The cylinder heads needed a cleaning as well. I had to take them apart - remove the valve springs, valves and rockers, and give them the same treatment as the block.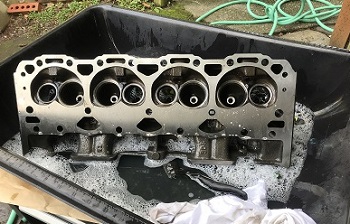 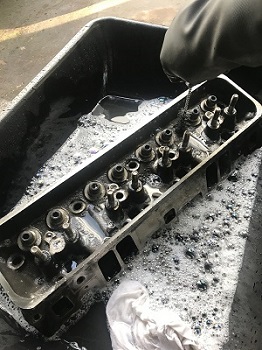 After cleaning, I have to start putting the engine together. First step is the cam shaft bearings. You need a special tool to do that, and it costs $180. I found out the machine shop will do it for you for $50, so It took it to AutoSport Seattle in Ballard. They were recommended by some of my friends from the VME, and they are great. The worst part was having to drive over to Ballard, but I dropped it off in the morning and it was ready by 3:00pm.
I've circled the camshaft bearings in the picture. They are more silver than the rest of the block, and are made of a softer
metal than everything else.
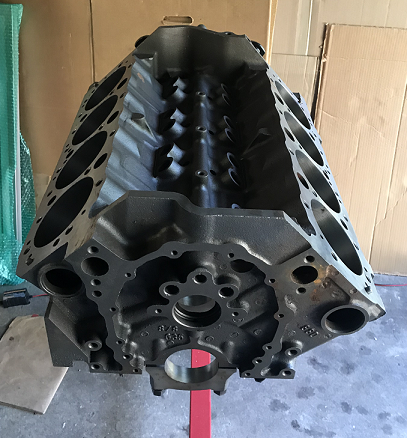
January, 2020Wow, finally doing some Trans Am work! I realized after the weekend that this is the first real work I've done on the engine project that wasn't either buying things or doing research. The first real work, and it's only 3 years into the project. I bought the engine block two and a half years ago. Before that, it was sitting in the garage of a race team for "a while". Which can create problems, like rust. The rust has to go and the block absolutely has to be cleaned to perfection before any progress can be made.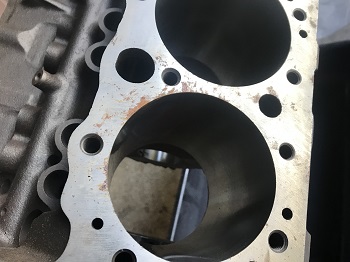 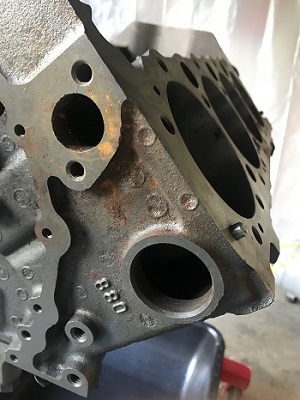 
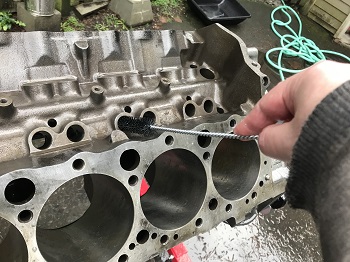
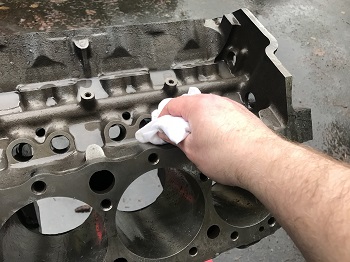
So I spent a day cleaning the block. I started with a wire brush, some very fine grit sandpaper, and solvent. I used special
brushes that could get into all the oil passages and water jacket corners of an engine block. Once the rust was off, I washed
with soap and water to get all the residue of dirt and solvent off. There are a million holes in an engine block, and all of
them need to be thouroughly cleaned. I ended spraying the block down with WD-40 and rubbing the cylinders with oil to prevent the rust from coming back. December, 2019
Well, the summer came and went and I didn't do anything to my Trans Am. Absolutely no work on the motor at all. That's pretty
disappointing, but I guess I have good excuses. I did a number of fun projects since the engine parts arrived in April. None
were Trans Am-related, though.
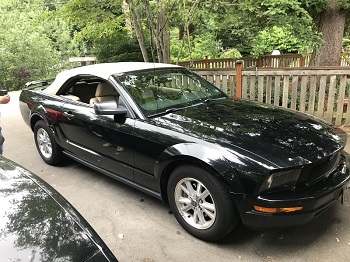
I put a new convertible top on my daughter's Mustang, going from leaky, cracked, tan top to stylish, dry, black top.
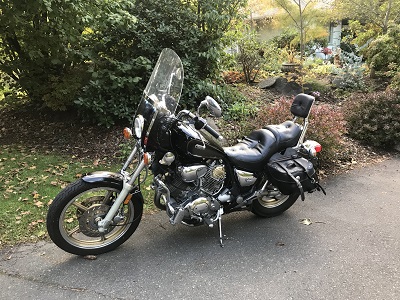
I rebuilt the carburetors on my dad's '86 Yamaha Virago. Turns out, the issue was the air filter, not the carbs, so a lot of
work for nothing. But at least it's running now.
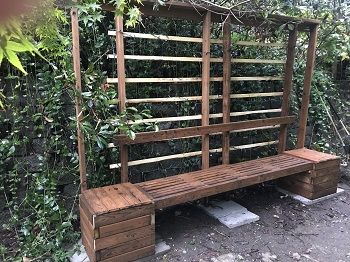
I built a bench and trellis for our back yard, to replace an old one that was rotting away.
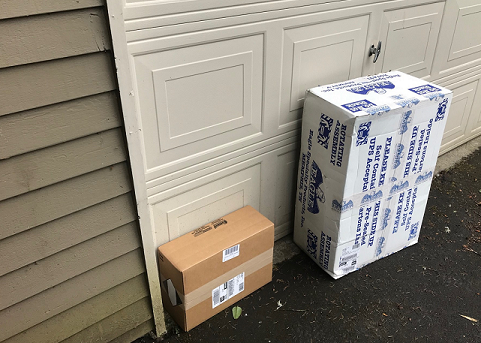
And I helped my stepdad restore this '67 Triumph Daytona 500, which I rode on a rally to Nelson, BC in the summer. So that's my excuse for letting another summer pass with no progress on the Trans Am. April, 2019Horsepower Santa Clause came to my house! I found these boxes in my driveway:
It's a bunch of stuff from Summit Racing. I'm going to spend the next couple weeks putting all this into the engine block. Should be lots of fun! Stephanie probably didn't want me putting all this stuff on the kitchen table, but she's out of town right now, so she coudln't object.
The Engine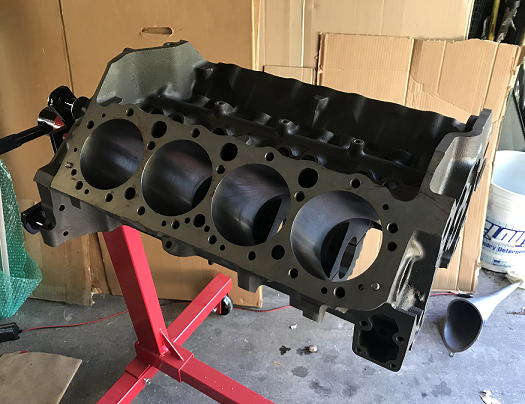 After watching craigslist for several months, I found the engine block that is going to be the foundation of my Trans Am's mighty power plant. It was a 350 small block chevy engine that had already been bored .030 over. I had to drive way down south near Buckley. There was a farm out in the woods with a big garage and a couple of racing trophy trucks sitting around. The gentlemen who owned it had raced desert trucks for a lot of years, and built many race engines for them. This block was going to be another one, but before it got completed, he made the decision to switch from the classic 350 small block to the more modern Chevy LS1 engine. He was clearing out all his old SBC inventory and I got a good deal.
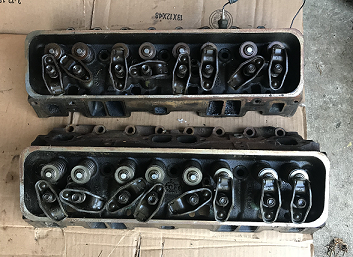
The HeadsFor the cylinder heads, I decided to go with some Vortec heads. These cylinder heads were added to the Gen I engine starting in 1996. They are based on the cylinder heads from the Gen II LT1 engine of the 90's, and add better air flow than previous heads.I started looking on craigslist for some Vortec heads. There are two versions - the standard ones with great air flow, and the heavy duty ones with hardened valve seats that don't have quite as good air flow. I eventually found the heavy duty kind. I have to take them to a machine shop to get a valve job, where they will grind the valve seats to have angles that will improve airflow.
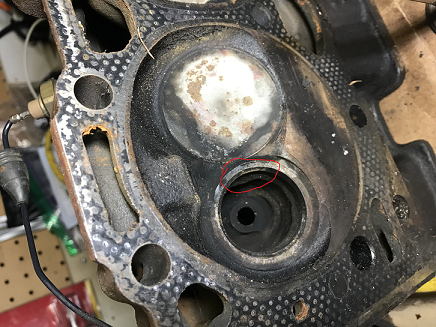
In this close-up, you can see the hardened valve seats. This ring of stronger metal could stand higher temperatures and pressure for long times. But it came at a cost of reduced airflow, which reduced peak power. A valve job from the machine shop should restore the airflow.
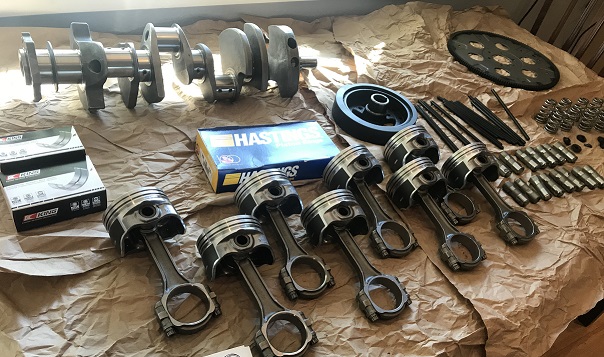
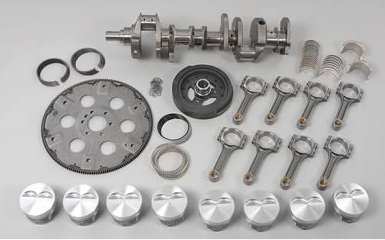
Next StepsUp next, I need to get the heads to a machine shop for that work. And I need to get a rotating assembly - that is, a collection of parts including a crank shaft, pistons, rings, bearings, etc - that go into the engine block to make it a working engine. I have the parts picked out, and I need to order them. Here's the picture from Summit Racing for the Eagle Street Performance Rotating Assembly, rated for up to 500 horsepower.
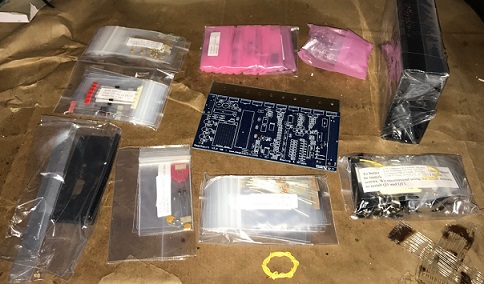
Fuel InjectionThe Trans Am first offered true per-cylinder fuel injection on the 1985 Tuned Port Injection (TPI) 305 engine. It was another two years before the TA would get the 350 TPI engine that was available on the Corvette.For a lot of project cars, people opt for carburetors, as there are none of the electronics and configuration of fuel injection. It’s simpler and easier to set up – bolt on a carb and adjust the screws to dial in the performance. With non-factory fuel injection, you need an Engine Control Unit (ECU) – the car’s computer – to control the injectors. There is a bit of custom wiring required, and a lot more work getting it adjusted for performance. For Bullet Bill, I wanted to keep the fuel injection. It is a bit more reliable and more fuel efficient than carburation, and it’s what my car originally came with. Since my new engine is going to be very different from the stock one, I can’t use the car’s current ECU. On some modern cars, you can reprogram the ECU yourself with a laptop and some software. But in 1990, the car’s operating system was flashed onto a chip and that was glued into a box under the dash. In order to change the car’s programming, you have to replace the chip, and it is not easy to make iterative changes as you try to perfect performance. You can buy aftermarket ECU’s that you can put on your car, which have USB ports that you can connect to a laptop and easily make changes to. There is even a homebrew ECU. It’s called the MegaSquirt, and it was developed by a bunch of car guys who were also engineers, all working together on an early internet forum in the mid-90’s. You can buy complete ECU’s based on that work, or you can build one yourself.
I need to practice soldering before I put the kit together. It’s too bad that Radio Shack isn’t a thing anymore, because now it is tough to find a chunk of old circuit board and a resistor or two to practice soldering and unsoldering. There are places to get that on the internet, and in the Seattle area, there are a couple of brick-and-mortar stores that still sell that stuff – Vetco Electronics in Bellevue and Fry’s in Renton, that I know of. Both of those places are at least a 45 minute drive. That is the next stage for me: perfect my soldering skills, then put together my MegaSquirt kit. There's only a couple hundred components that are so neatly organized in those little plastic bags, and plenty of room on that circuit board to ut them all next to each other.
|
|
 So, I put the new part in, and the car started up. I drove directly to Jiffy Lube because the radiator was still full of gunk from the mixing of different anti-freezes. I kept my fingers crossed the whole way that the ignition coil really solved the problem, and it wasn't something else. The car did not die, and I got the radiator flushed and filled, and all the crud cleaned out. Only $180 for the mistake of using the wrong anti-freeze! The car stop and started just fine through the process, and I got home without any trouble.
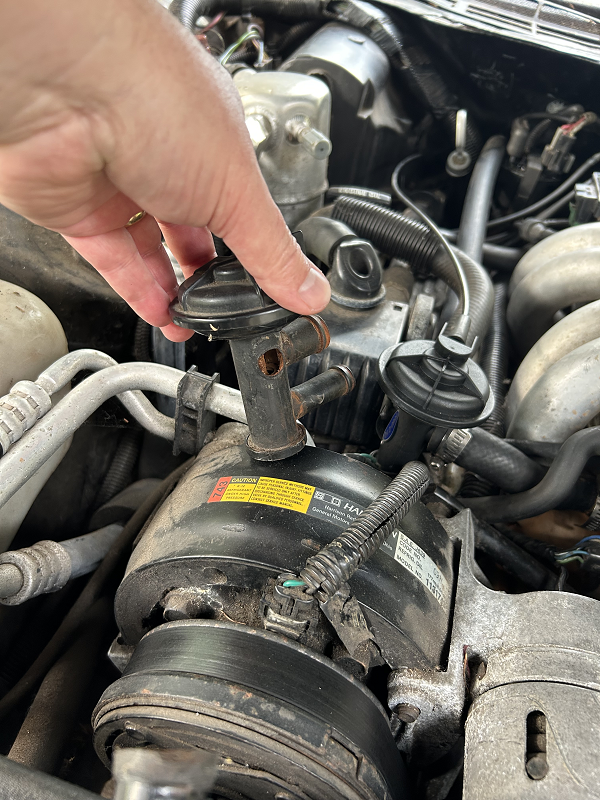


 I thought long and hard about this. Part of the reason I’m doing the Trans Am project is to learn all about how cars work
and how to do stuff myself, so I was leaning to building my own. But cars are harsh environments for electronics. The
temperature changes and vibrations are rough for sensitive components. I have really limited experience soldering components
onto circuit boards, and if my connections are good, they could be an easy failure point. But hey, if you don’t try, you’ll
never learn. So I went ahead and bought the DIY kit.
I thought long and hard about this. Part of the reason I’m doing the Trans Am project is to learn all about how cars work
and how to do stuff myself, so I was leaning to building my own. But cars are harsh environments for electronics. The
temperature changes and vibrations are rough for sensitive components. I have really limited experience soldering components
onto circuit boards, and if my connections are good, they could be an easy failure point. But hey, if you don’t try, you’ll
never learn. So I went ahead and bought the DIY kit.